If you have not setup your payroll provider, follow these steps.
** Before your first export, follow these steps to ensure imports are easier to perform.
Table of Contents
From TimeWellScheduled
- Go to TIME CARD & PAYROLL
- Go to REVIEW, UPDATE AND APPROVE TIME CARDS – make sure all time cards for the period you want to export are approved.
- Go to TIME CARD & PAYROLL
- Go to HOUR & SHIFT PREPARATION REPORT
- Enter the required date range for the pay period (easiest to click the date field, pick last 2 weeks for example)
- Make sure the filters are correct (default is all departments, hourly, active employees)
- Review the hours
- If wrong, go back to time cards and edit
- If correct, continue
- Click the EXPORT TO EASYPAY
- Right click the filename, click SAVE FILE AS and save to your preferred folder.
Into Easypay
- Close previous pay period
- Make any changes to employee profiles (i.e. terminations, activations)
- Print list of active employees using the click & pick reports
- Select from the menu Periodic
- Then select Customizer Module
- Then select Import timecards
- Then select Create regular time cards
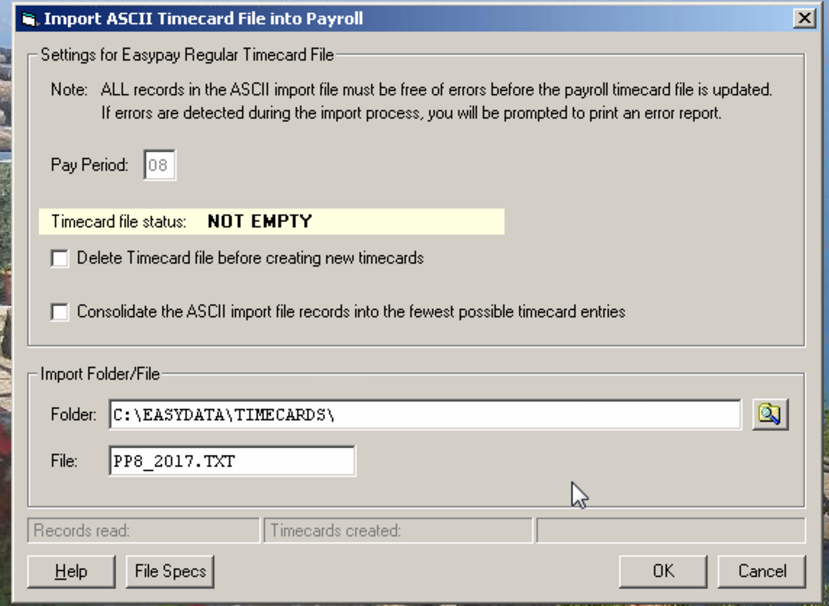
- Check to ensure correct pay period is showing. Change as required
- Select Import Folder/File, select the correct folder that has already been set up

- Click O.K. twice
- Verify that the timecards are there
NOTE – if you encounter any Easypay warnings, the import can continue.
If you encounter any ERRORS, the import will stop.
Usual issues are employee code or department code not matching.
Ex. In Easypay the employee code is ‘0123’ it MUST be ‘0123’ in TimeWellScheduled.
